
The Paradox of Statelessness#
Kubernetes is designed to be ephemeral. Pods die, nodes are replaced, and the cluster heals itself. This “stateless” philosophy is efficient for application logic, but it hits a hard wall when you need to store data. Databases, message queues, and media servers all need a place to live that persists beyond a pod restart.
In a cloud environment like GCP or AWS, you simply request a PersistentVolumeClaim (PVC), and the cloud provider magically provisions a Persistent Disk or EBS volume. In a bare-metal or homelab environment, that magic doesn’t exist. You have to build it yourself.
In previous posts, we built our bare-mental networking stack and secured it with automated TLS. Now, we tackle another critical pillar of a production-ready platform: Persistent Storage.
This guide explores why I chose Longhorn for my Talos-based clusters and walks through the specific configurations required to make it work on an immutable OS.
The Landscape: Why Longhorn?#
When choosing a storage solution for a Kubernetes homelab, the research typically leads to four main paths:
1. Local Persistent Volumes#
- Pros: Zero overhead, native capability. Great for learning.
- Cons: It binds a pod to a specific node. If that node reboots or fails, your pod cannot be rescheduled elsewhere because the data is trapped locally. This violates our “high availability” goal.
2. External NAS (NFS / iSCSI)#
- NFS: Extremely simple (I use Unraid as NAS), but it is file-level storage. Databases like PostgreSQL often suffer performance penalties or corruption risks on NFS.
- iSCSI: Unlike NFS, this provides proper block storage. However, using a single NAS (Synology/TrueNAS) creates a single point of failure. If the NAS updates or crashes, the entire cluster halts.
3. Ceph / Rook#
- Pros: The industry “gold standard.” Highly scalable, supports block, object, and file storage.
- Context: Ceph is central to my long-term architectural vision and will eventually underpin the Proxmox layer itself.
- The Constraint: Currently, I haven’t fully assembled the hardware for the target 3-node Ceph cluster in my Proxmox configuration. Additionally, running Ceph on Talos requires specific workarounds for the immutable filesystem (handling
/etc/cephmounts) that add complexity I’m postponing for now.
4. Longhorn#
Longhorn, a CNCF incubating project by Rancher, acts as the perfect bridge solution.
- Block Storage: Provides proper RWO (ReadWriteOnce) block devices, essential for running databases.
- Replication: Synchronously replicates data across multiple nodes (defaulting to 3 copies). If a node fails, the volume remains accessible from another node instantly.
- Backups: Features built-in, easy-to-configure backups to S3-compatible targets (like MinIO or AWS S3).
- UI: Includes a comprehensive built-in dashboard for visibility, which offers immediate insights that often require complex plugins in Ceph.
For my current setup, Longhorn delivers the “Cloud Storage” experience I need immediately. It enables me to proceed with the application platform build while the underlying physical infrastructure is finalized.
The Challenge: Longhorn on Immutable OS#
Installing Longhorn on a standard Ubuntu node is usually just a Helm chart installation. Talos Linux, however, is immutable. You cannot SSH into a node and run apt-get install open-iscsi. The root filesystem is read-only.
To make Longhorn work, we need to modify our node configuration to:
- Inject System Extensions: Load the necessary kernel modules and tools (iSCSI) that Longhorn depends on.
- Configure Mounts: Bind-mount specific paths so the Longhorn containers can write to the underlying host disk.
- Relax Security: Allow Longhorn’s privileged containers to perform low-level operations.
Implementation Guide#
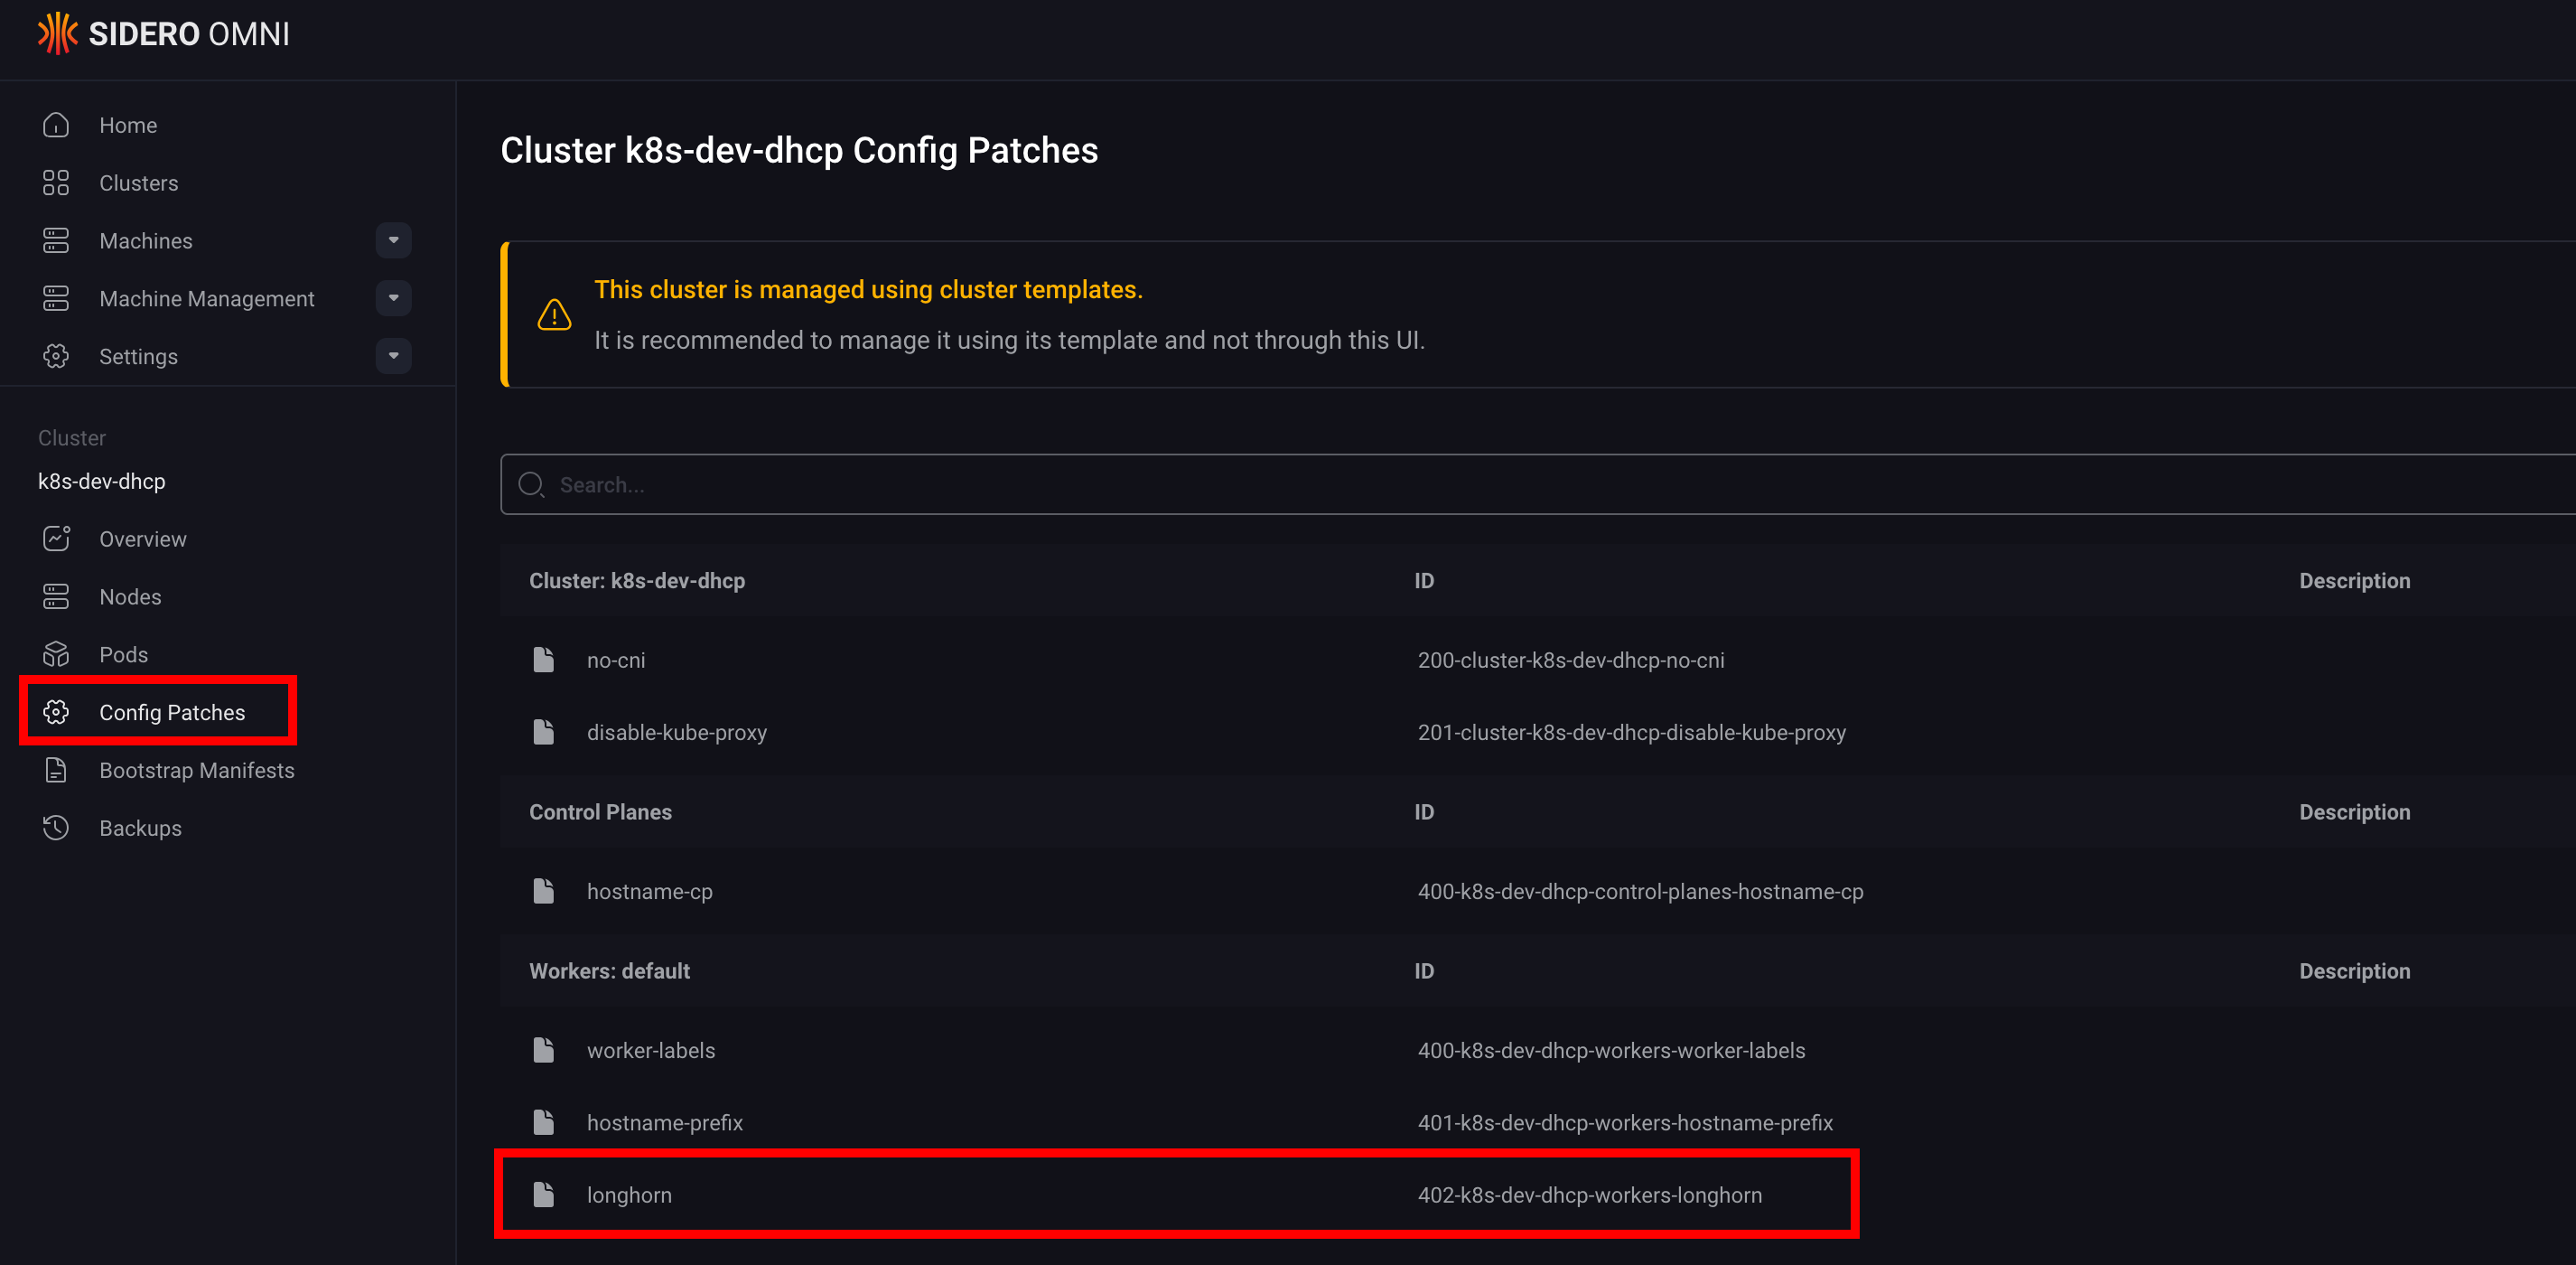
We will implement these modifications in our sidero-omni-talos-proxmox repository, acting on the machine configurations and applying the updates to the cluster.
1. Enabling System Extensions#
Longhorn requires iscsi-tools to manage block devices and util-linux-tools for filesystem operations. In Talos, we declare these in the systemExtensions block of our machine configuration.
File: cluster-template/k8s-dev-dhcp.yaml (or your specific worker config)
systemExtensions:
  - siderolabs/iscsi-tools
- siderolabs/util-linux-toolsNote: If you are using my Omni Proxmox setup, you might also have
qemu-guest-agentornfsdhere. Just ensure the list is additive.
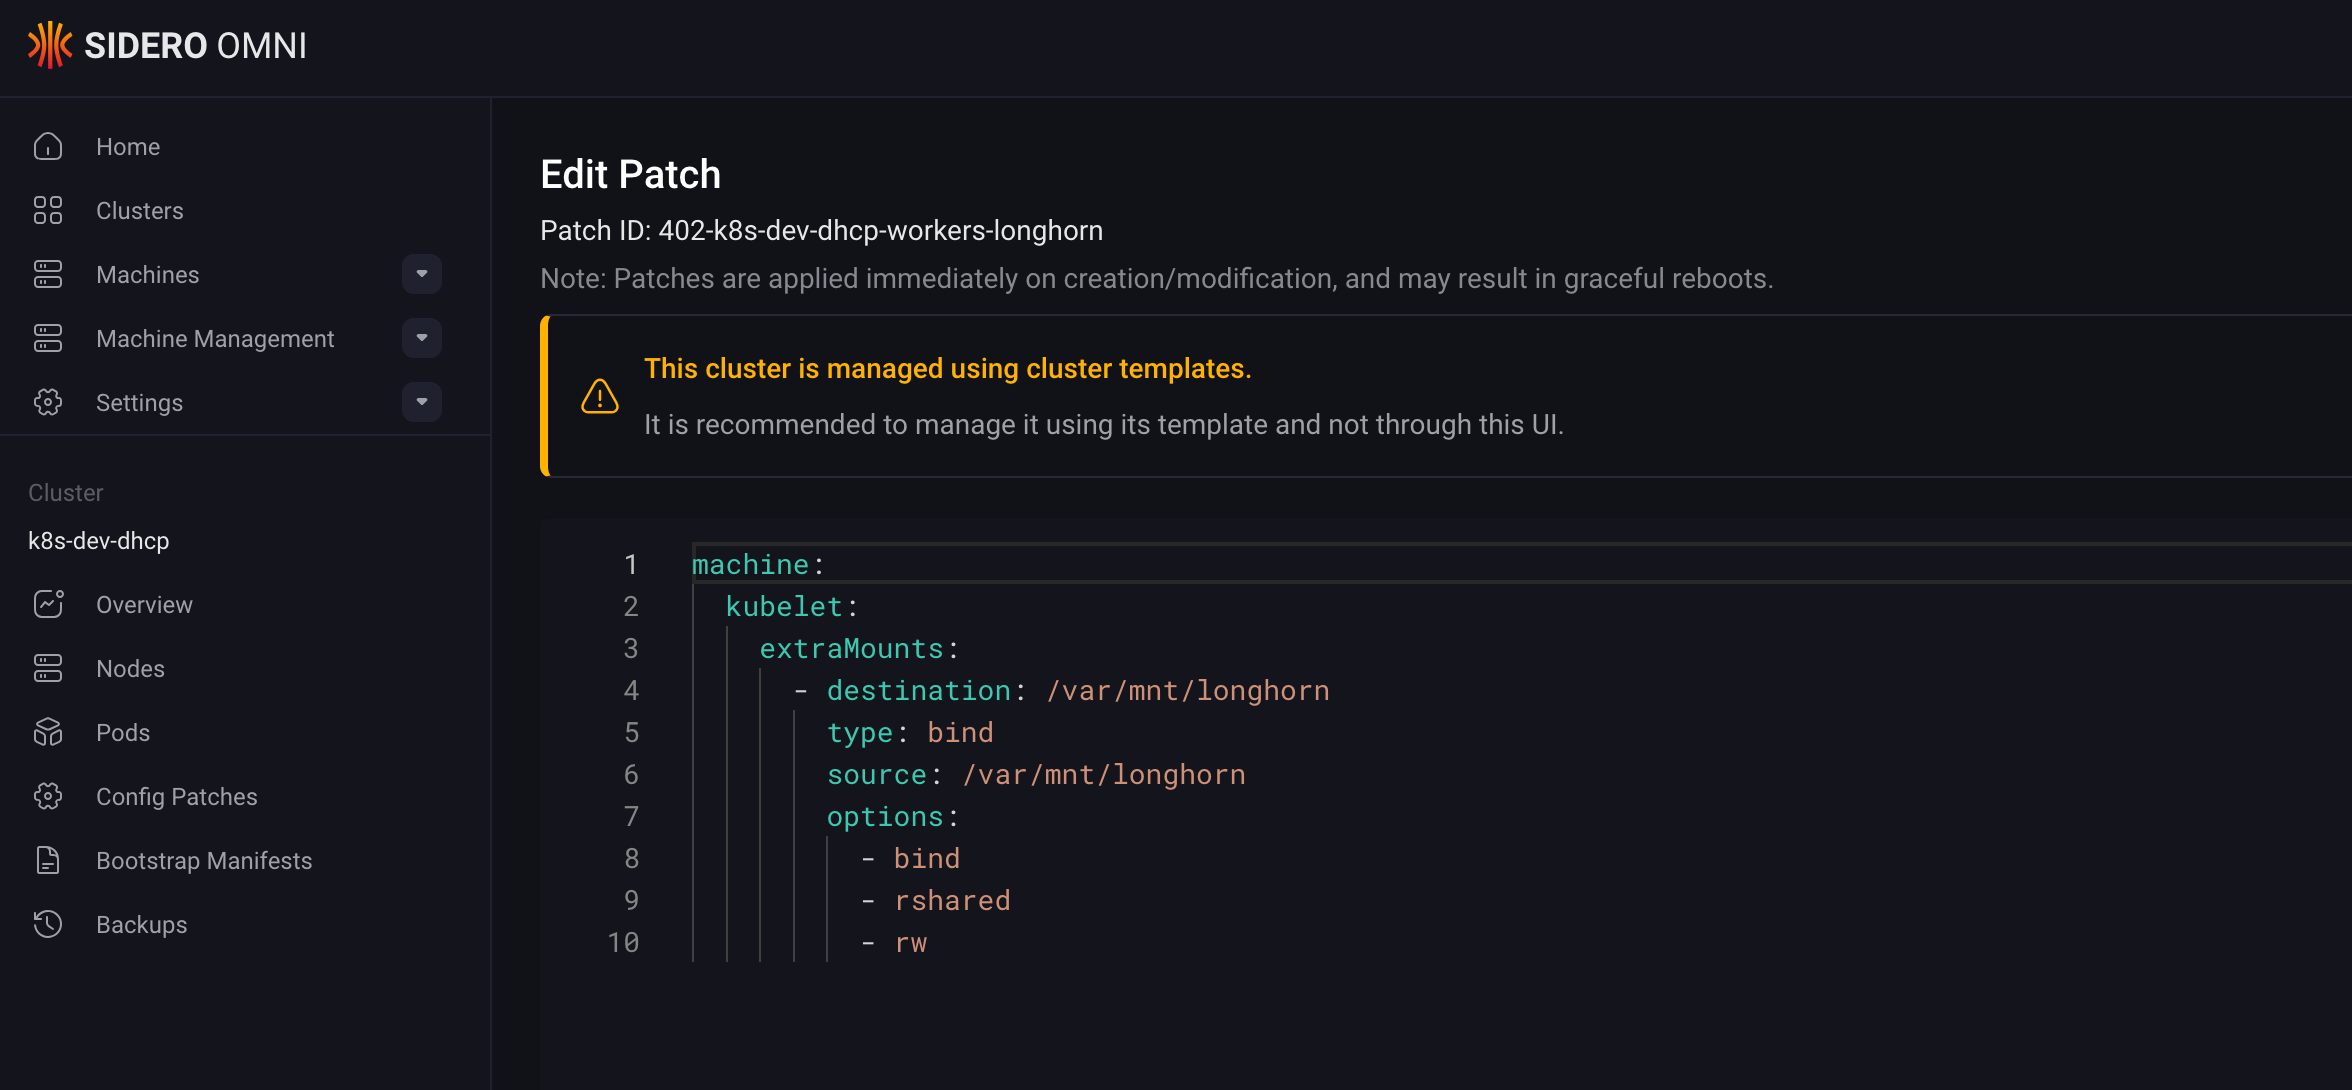
2. Configuring Data Path Mounts#
Longhorn stores its data in /var/lib/longhorn by default. On Talos, we need to explicitly allow the kubelet to pass this directory through to the containers. We achieve this by patching the machine configuration with extraMounts.
Create a patch file patches/longhorn.yaml:
machine:
  kubelet:
    extraMounts:
      - destination: /var/mnt/longhorn
        type: bind
        source: /var/mnt/longhorn
        options:
          - bind
          - rshared
          - rw
Then, reference this patch in your Workers configuration block. This ensures that every worker node in your cluster is “Longhorn-ready” upon boot.
kind: Workers
name: workers
machineClass:
  name: proxmox-worker
# ... other configs ...
patches:
  - name: worker-labels
    inline:
      machine:
        nodeLabels:
          node-role.kubernetes.io/worker: ""
  - name: longhorn
    file: patches/longhorn.yaml
Once the configuration is updated, apply it to your cluster:
omnictl cluster template sync -v -f cluster-template/k8s-dev-dhcp.yamlThis will trigger a rolling update of your nodes.
3. Deploying via GitOps#
With the infrastructure prepared, we transition to the application layer. Adhering to our standard GitOps workflow, we deploy Longhorn via Argo CD by creating a base configuration for the Helm chart, followed by environment-specific customizations using Kustomize overlays.
Namespace Configuration#
Longhorn requires privileged access to the nodes. We need to label the namespace to allow this, bypassing the default Pod Security Standards.
apiVersion: v1
kind: Namespace
metadata:
  name: longhorn-system
  labels:
    pod-security.kubernetes.io/enforce: privileged
    pod-security.kubernetes.io/audit: privileged
    pod-security.kubernetes.io/warn: privileged
Application Definition#
Add the helm chart repository (https://charts.longhorn.io/) to your allowed projects list in Argo CD. Then, create the Application.
Crucial Tip: Disable the preUpgradeChecker. In a GitOps environment, this job often hangs or fails because it expects an interactive upgrade flow.
apiVersion: argoproj.io/v1alpha1
kind: Application
metadata:
  name: longhorn
  namespace: argocd
spec:
  project: argo-config
  source:
    repoURL: https://charts.longhorn.io
    chart: longhorn
    targetRevision: v1.11.0
    helm:
      values: |
        preUpgradeChecker:
          jobEnabled: false # Vital for GitOps
  destination:
    server: https://kubernetes.default.svc
    namespace: longhorn-system
  syncPolicy:
    automated:
      prune: true
selfHeal: trueVerification#
Once Argo CD syncs, you should see the Longhorn pods spinning up. You can access the Longhorn UI (I expose mine via an Ingress at longhorn.dev.thebestpractice.tech) to verify the health of your storage implementation.
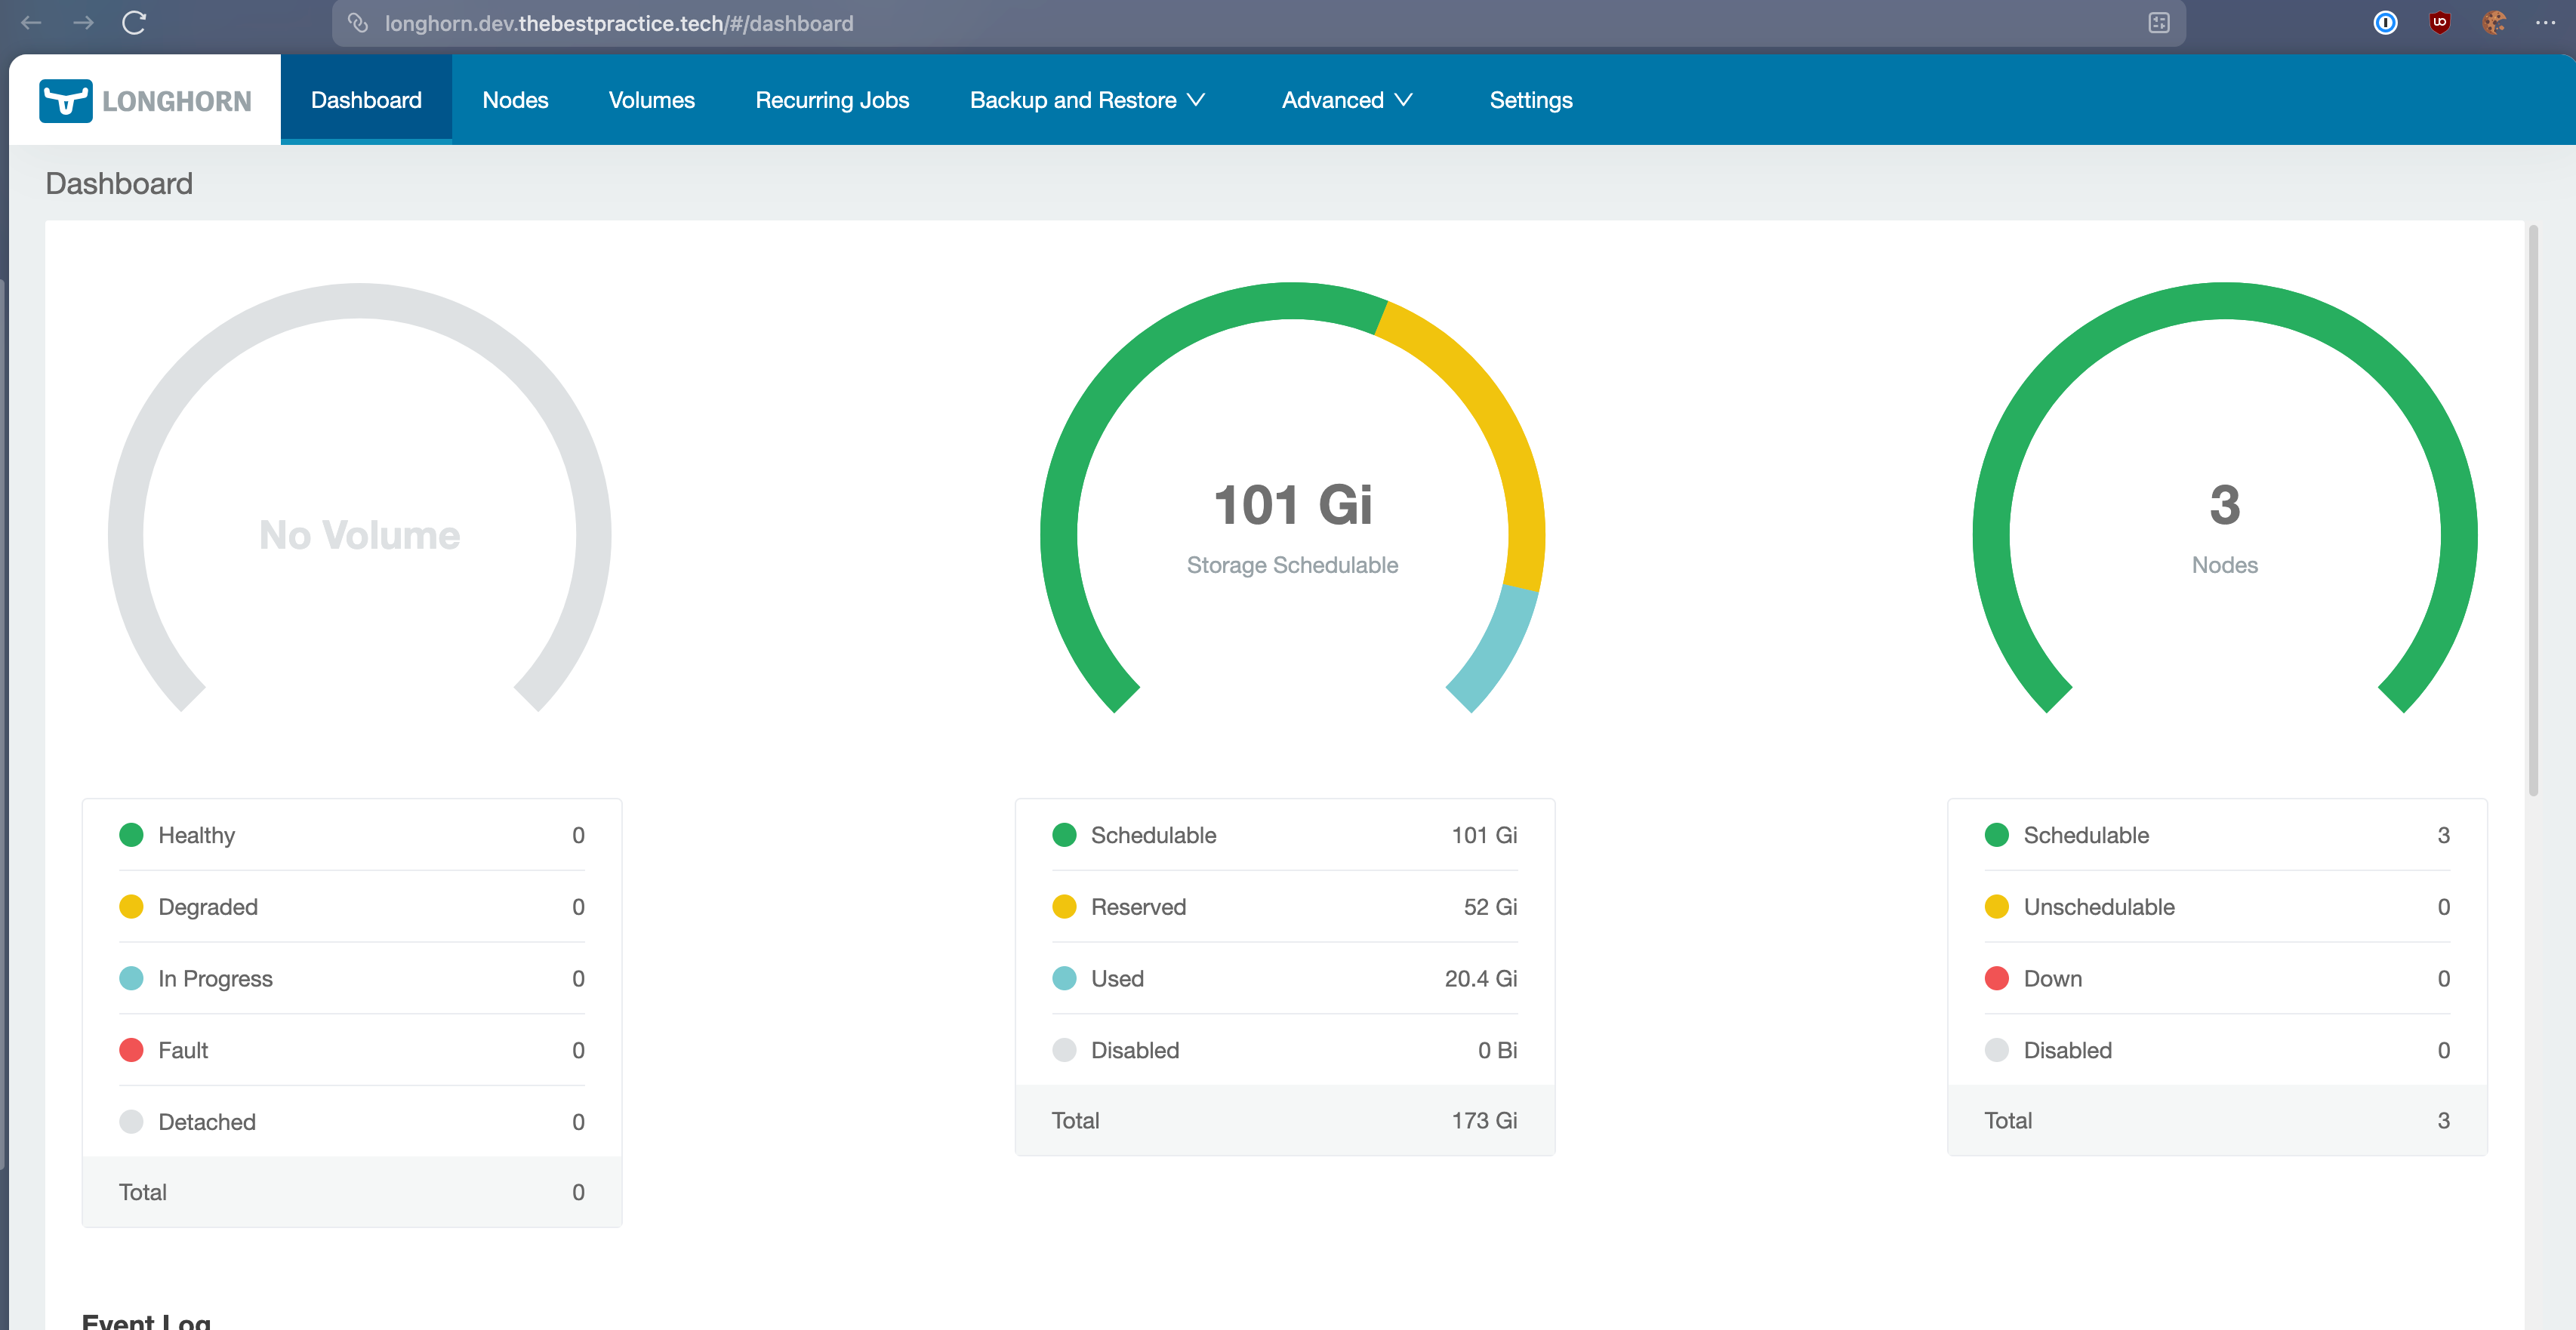
You now have a fully replicated, distributed block storage system running on immutable infrastructure.
Conclusion#
We’ve successfully bridged another gap between “homelab” and “enterprise.” By combining the immutability of Talos with the flexibility of Longhorn, we have a storage platform that is both secure by default and robust enough for critical data.
In the next post, we will leverage this storage foundation to deploy Keycloak, our Identity Provider. Keycloak requires a resident database (PostgreSQL), which effectively needs the robust, distributed block storage we just built. It is the perfect real-world test for our new persistence layer.
Stay tuned! Andrei