
Take Back Control of Your Identity#
Over the last few months, we’ve built a platform that rivals small enterprise setups. We have established a resilient networking layer with automated TLS, deployed distributed block storage with Longhorn, and mastered PostgreSQL on Kubernetes with CloudNativePG.
Our infrastructure is ready, but there is one critical component where many engineers… even experienced ones… take the easy way out: Identity.
It’s tempting to just slap “Login with Google” on your services or, worse, rely on a dozen local admin accounts. But in the regulated environments I work in, identity isn’t something you casually outsource. It is the new perimeter. If you don’t control your Identity and Access Management (IAM), you don’t really control your platform.
This post marks a turning point. We are moving from infrastructure to platform services. We will deploy Keycloak, the industry-standard open-source IAM solution, using the same GitOps and high-availability patterns I trust in production. We aren’t just installing an app; we’re reclaiming sovereignty over our authentication layer.
Why Keycloak? Moving Beyond “Admin-123”#
If you’ve followed this series, you know my philosophy: build it like you’re running a bank. In a high-stakes environment, we don’t log into systems with local admin accounts and shared passwords. That’s a security incident waiting to happen. Yet, in many homelabs, that’s exactly what happens… a sprawling mess of local users across Grafana, Proxmox, and Argo CD.
Keycloak allows us to stop that madness. It is the open-source standard for Identity and Access Management (IAM), effectively the self-hosted equivalent of Auth0 or Okta. I’ve deployed Keycloak in environments handling sensitive financial data because it offers total control without sacrificing capability.
Here is why it effectively becomes the “brain” of your platform’s security:
- True Single Sign-On (SSO): You authenticate once, and the doors open to Grafana, Argo CD, and your custom apps. No more password fatigue.
- Identity Brokering (The ‘Killer Feature’): This is my favorite capability. Keycloak can front other identity providers. Want to let users log in with GitHub or Google? You connect them to Keycloak, and Keycloak handles the complex translation layer for your applications. Your apps only ever need to know about Keycloak.
- Standardization: It speaks perfectly fluent OIDC (OpenID Connect) and SAML 2.0. Learning to configure these protocols in Keycloak is a directly transferable skill to any enterprise IAM role.
- Centralized User Federation: Whether you are syncing from an existing LDAP/AD or managing users directly, you have one source of truth.
By deploying this, we aren’t just installing a login screen; we are implementing the same centralized security posture used by the world’s largest enterprises.
The Architectural Blueprint & Implementation Guide#
Deploying Keycloak “the easy way” often involves using its embedded, non-production database. We’re not doing that. Our goal is a resilient, production-grade setup, which means leveraging the robust infrastructure we’ve already built.
Our architecture consists of several key components, all managed declaratively:
- Argo CD: Our trusted GitOps engine, ensuring the deployed state matches our Git repository.
- CloudNativePG (CNPG): To provide a highly available PostgreSQL database running on our distributed Longhorn storage.
- External Secrets Operator: To securely inject credentials from 1Password.
- Traefik: Our ingress gateway, configured to expose Keycloak securely over HTTPS.
Here is how we assemble these components step-by-step.
Step 1: The Database Foundation with CloudNativePG#
First, Keycloak needs a database. We’ll use the pattern from our guide on mastering PostgreSQL on Kubernetes with CloudNativePG to provision a dedicated cluster. This relies on the longhorn-cnpg StorageClass we configured in the Longhorn on Talos Linux post.
We start by creating a secret for the database user, pulling credentials securely from 1Password using the method from my post on automating Kubernetes secrets.
File: base/secrets/keycloak/keycloak-db-user.yaml
---
apiVersion: external-secrets.io/v1
kind: ExternalSecret
metadata:
  name: keycloak-db-user
  namespace: keycloak
spec:
  secretStoreRef:
    kind: ClusterSecretStore
    name: op-cluster-secret-store
  target:
    creationPolicy: Owner
    template:
      type: kubernetes.io/basic-auth
  data:
  - secretKey: username
    remoteRef:
      key: EXTSEC_1Password_Keycloak_secrets
      property: db_user
  - secretKey: password
    remoteRef:
      key: EXTSEC_1Password_Keycloak_secrets
      property: db_user_pwd_dev
Next, we define the CNPG cluster itself.
File: environments/dev/database/cnpg-cluster/clusters/keycloak/override.values.yaml
type: postgresql
mode: standalone

version:
  postgresql: "16"

cluster:
  instances: 3
  storage:
    size: 2Gi
    storageClass: "longhorn-cnpg"
  superuserSecret: keycloak-db-superuser # Managed by ESO
  initdb:
    database: keycloak
    owner: keycloak # The user from our secret
    secret:
      name: keycloak-db-user
Step 2: Deploying Keycloak with the Cloud Pirates Helm Chart#
We’ll use the well-maintained cloudpirates/keycloak Helm chart and define the Argo CD Application.
File: base/keycloak/keycloak.yaml
apiVersion: argoproj.io/v1alpha1
kind: Application
metadata:
  name: keycloak
  namespace: argocd
spec:
  destination:
    namespace: keycloak
    server: https://kubernetes.default.svc
  project: argo-config
  sources:
    - repoURL: https://github.com/anvaplus/homelab-k8s-argo-config.git
      targetRevision: main
      ref: valuesRepo
    - repoURL: "registry-1.docker.io/cloudpirates"
      targetRevision: "0.16.4"
      chart: keycloak
      helm:
        valueFiles:
          - $valuesRepo/base/keycloak/values.yaml
Step 3: Configuration and Secrets#
Now, we customize the deployment. We create another ExternalSecret for the Keycloak admin password.
File: environments/dev/keycloak/custom-values/keycloak-secrets.yaml
---
apiVersion: external-secrets.io/v1
kind: ExternalSecret
metadata:
  name: keycloak-secrets
  namespace: keycloak
spec:
  secretStoreRef:
    kind: ClusterSecretStore
    name: op-cluster-secret-store
  target:
    creationPolicy: Owner
  data:
  - secretKey: admin-password
    remoteRef:
      key: EXTSEC_1Password_Keycloak_secrets
      property: admin_pwd_dev
Then, we provide the environment-specific Helm values to connect Keycloak to our external database and use the admin secret.
File: environments/dev/keycloak/custom-values/custom-values.yaml
keycloak:
  adminUser: admin
  existingSecret: "keycloak-secrets"
  secretKeys:
    adminPasswordKey: "admin-password"
  proxyHeaders: "xforwarded" # Important for use behind Traefik
  production: true

# Disable embedded databases
postgres:
  enabled: false
mariadb:
  enabled: false

# Configure external database connection
database:
  type: "postgres"
  host: "cnpg-keycloak-rw.keycloak.svc.cluster.local" # The CNPG service
  port: "5432"
  name: "keycloak"
  existingSecret: "keycloak-db-user"
  secretKeys:
    passwordKey: "password"
    usernameKey: "username"
Step 4: Exposing Keycloak via Traefik#
The final piece is to create an HTTPRoute to expose the Keycloak service. This leverages the secure ingress path we built in our Automated TLS with Cert-Manager guide.
File: environments/dev/ingress/routes/http-routes/keycloak.yaml
kind: HTTPRoute
apiVersion: gateway.networking.k8s.io/v1beta1
metadata:
  name: keycloak
  namespace: keycloak
spec:
  parentRefs:
    - kind: Gateway
      name: traefik-gateway
      namespace: traefik
      sectionName: websecure
  hostnames: [keycloak.dev.thebestpractice.tech]
  rules:
    - matches:
        - path:
            type: PathPrefix
            value: /
      backendRefs:
        - name: keycloak
          kind: Service
          port: 8080
Verification: The Login Page#
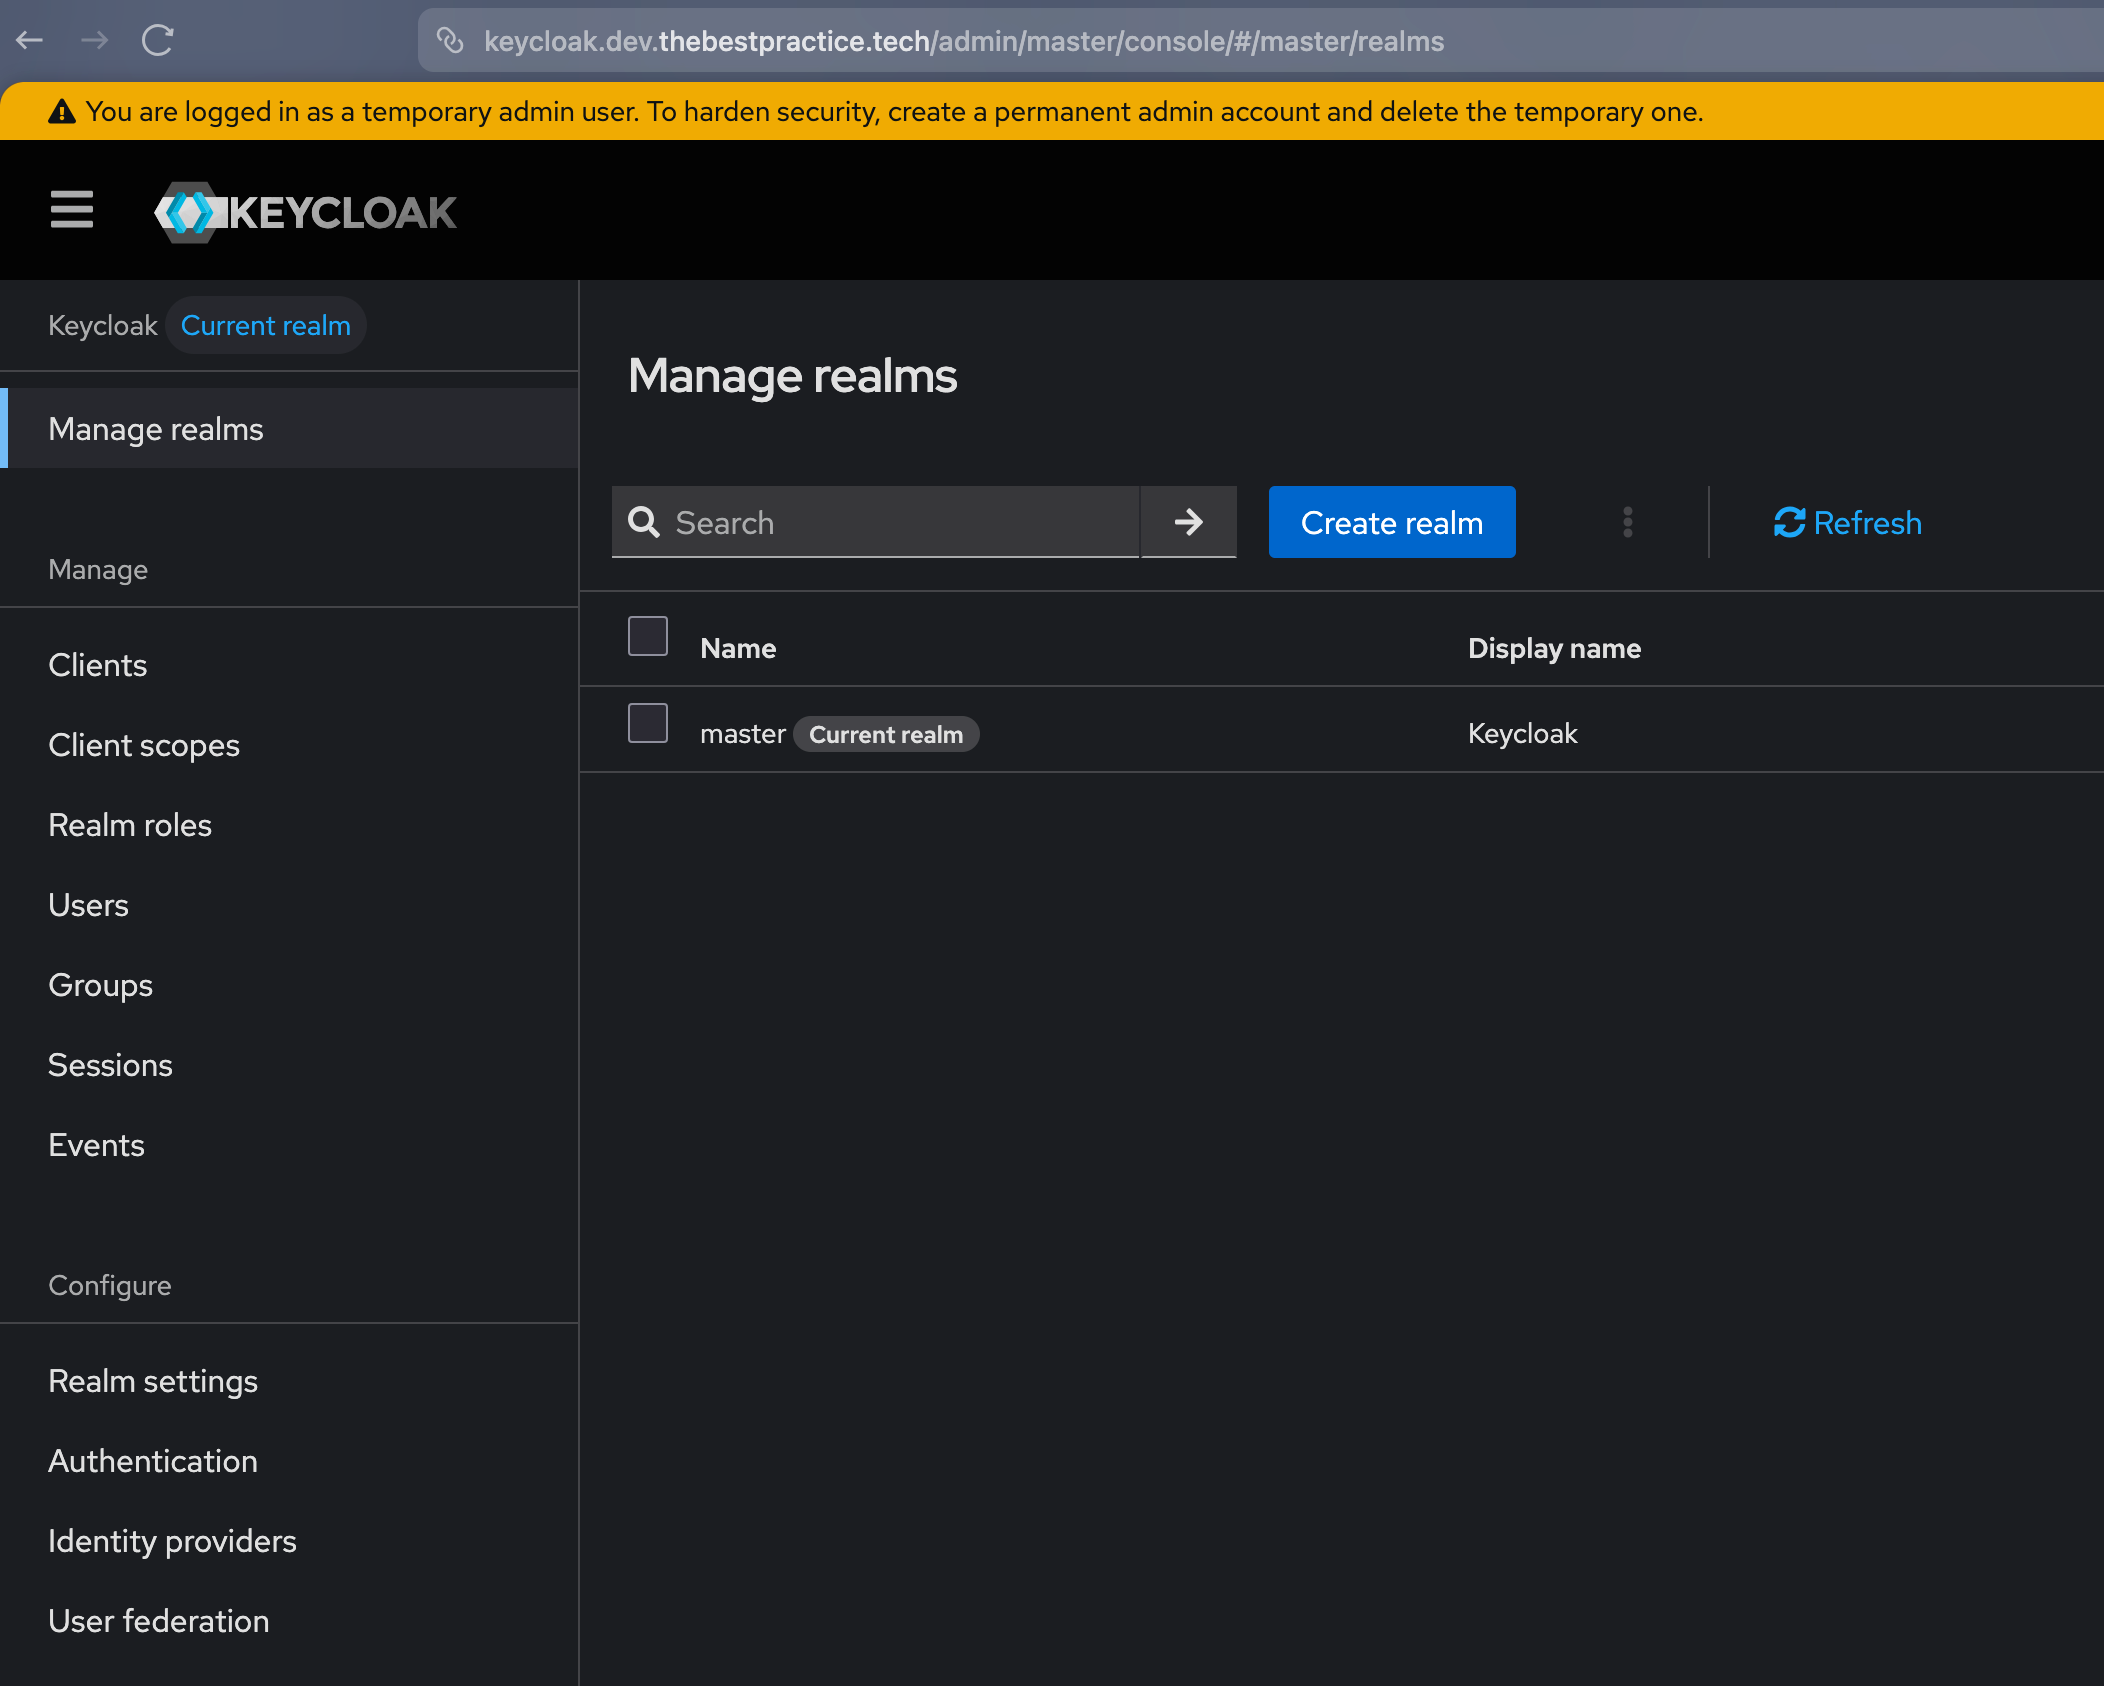
Once Argo CD has synced all the changes, the entire stack is live. You can navigate to https://keycloak.dev.thebestpractice.tech and be greeted by the Keycloak login page, served securely over HTTPS.
You can log in to the master realm with the username admin and the password injected by the External Secrets Operator.
Conclusion: The Platform Takes Shape#
By deploying Keycloak, we’ve done more than just tick a box on a feature list. We’ve established a sovereign identity perimeter. We now have a production-grade IAM system that doesn’t rely on third-party cloud providers or scattered local accounts.
This deployment is the ultimate validation of our GitOps architecture. Every layer we’ve built—from the distributed storage handling the database to the automated certificates securing the ingress—worked in concert to deliver a critical platform service. We didn’t take shortcuts, and the result is a system that stands toe-to-toe with enterprise environments.
As always, the complete configuration is available in my homelab-k8s-argo-config GitHub repository.
Stay tuned as we begin to integrate our services with Keycloak, unlocking the power of Single Sign-On across the homelab.
Andrei