
In the world of platform engineering, our goal is always to automate everything. But before we can appreciate the elegance of a fully automated workflow, it’s incredibly valuable to walk through the manual process at least once. It builds a deep understanding of what’s happening under the hood.
After setting up my Kubernetes management plane in “Enterprise Kubernetes at Home - A Guide to Installing Talos Omni,” my next step was to create my first cluster. While my ultimate goal was zero-touch provisioning (a story for the next post!), I started by taking the scenic route: manually deploying a Talos Linux Kubernetes Cluster on Proxmox using the ISO image.
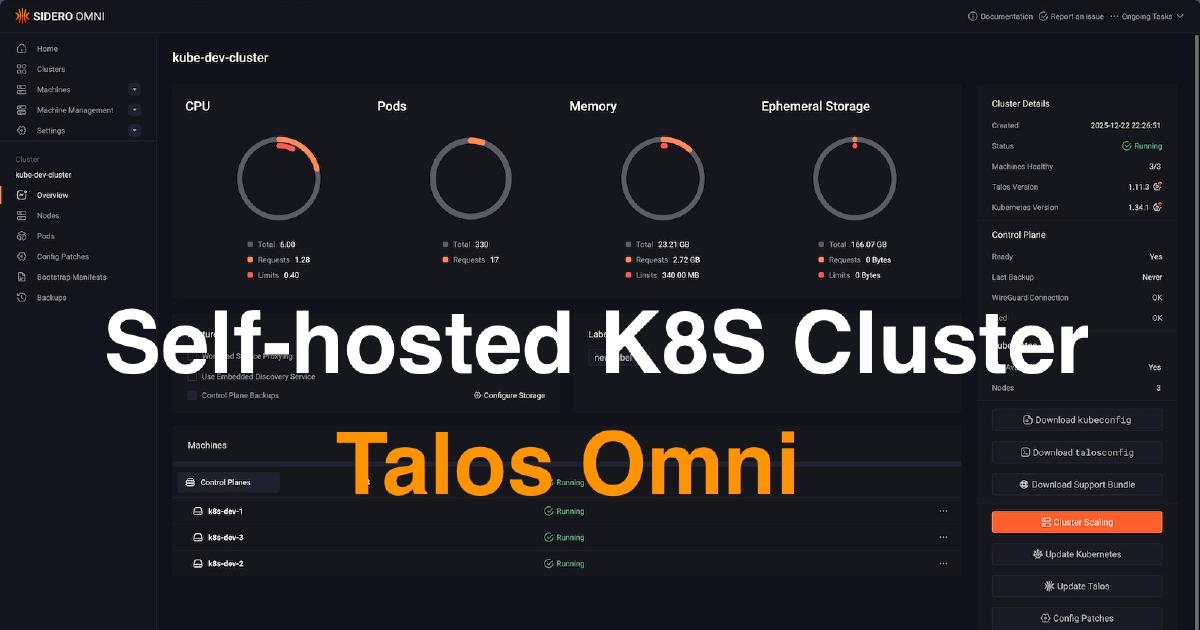
This post is a step-by-step guide to that process. We’ll go from downloading the installation media to running kubectl get nodes on a fully functional, three-node development cluster.
The Goal: A 3-Node Development Cluster#
Our objective is to create a small, flexible Kubernetes cluster suitable for development and testing. To maximize our resources, we’ll configure it so that workloads can run on the control plane nodes. This gives us a three-node cluster where every node is a usable worker.
Step 1: Download and Prepare the Talos ISO#
First, we need the installation media. Talos makes this easy.
- Log in to your Talos Omni UI.
- Navigate to the Media section.
- Download the generic image (amd64). You won’t need any extensions for this basic setup.
- Once downloaded, upload the ISO file to your Proxmox server’s ISO storage.
Step 2: Create the Proxmox Virtual Machines#
Now, we’ll create the three VMs that will form our cluster. In Proxmox, create three identical VMs with the following specifications:
- OS: Use the Talos ISO you just uploaded.
- System: Enable the QEMU Agent. This is important for Proxmox to properly manage the VM.
- Hard Disk: 64 GB is plenty for a development node.
- CPU/Memory: I’ve allocated 8192 MiB of RAM and 2 cores per node.
- Naming: Name them
k8s-dev-1,k8s-dev-2, andk8s-dev-3.
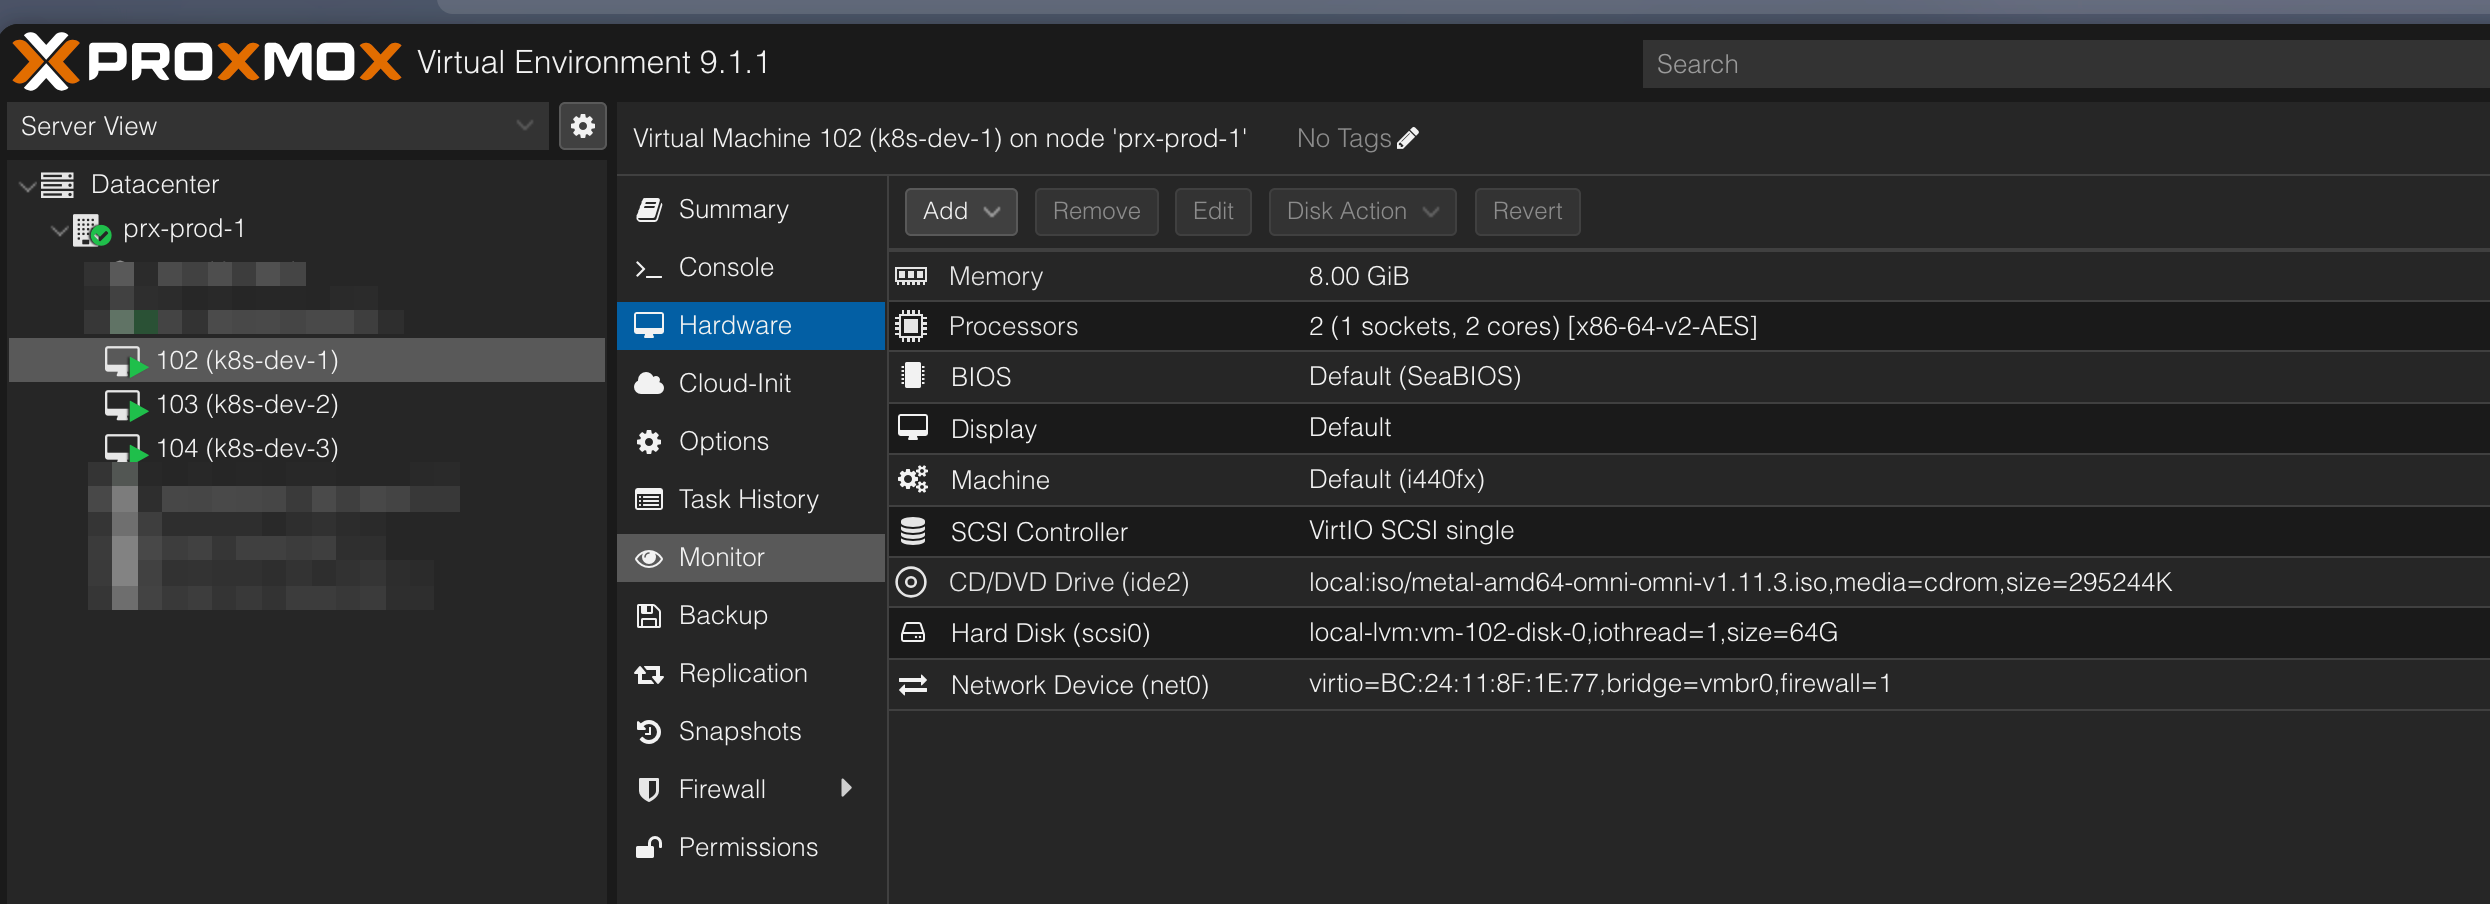
Once configured, start all three VMs.
Step 3: Manual Network Configuration#
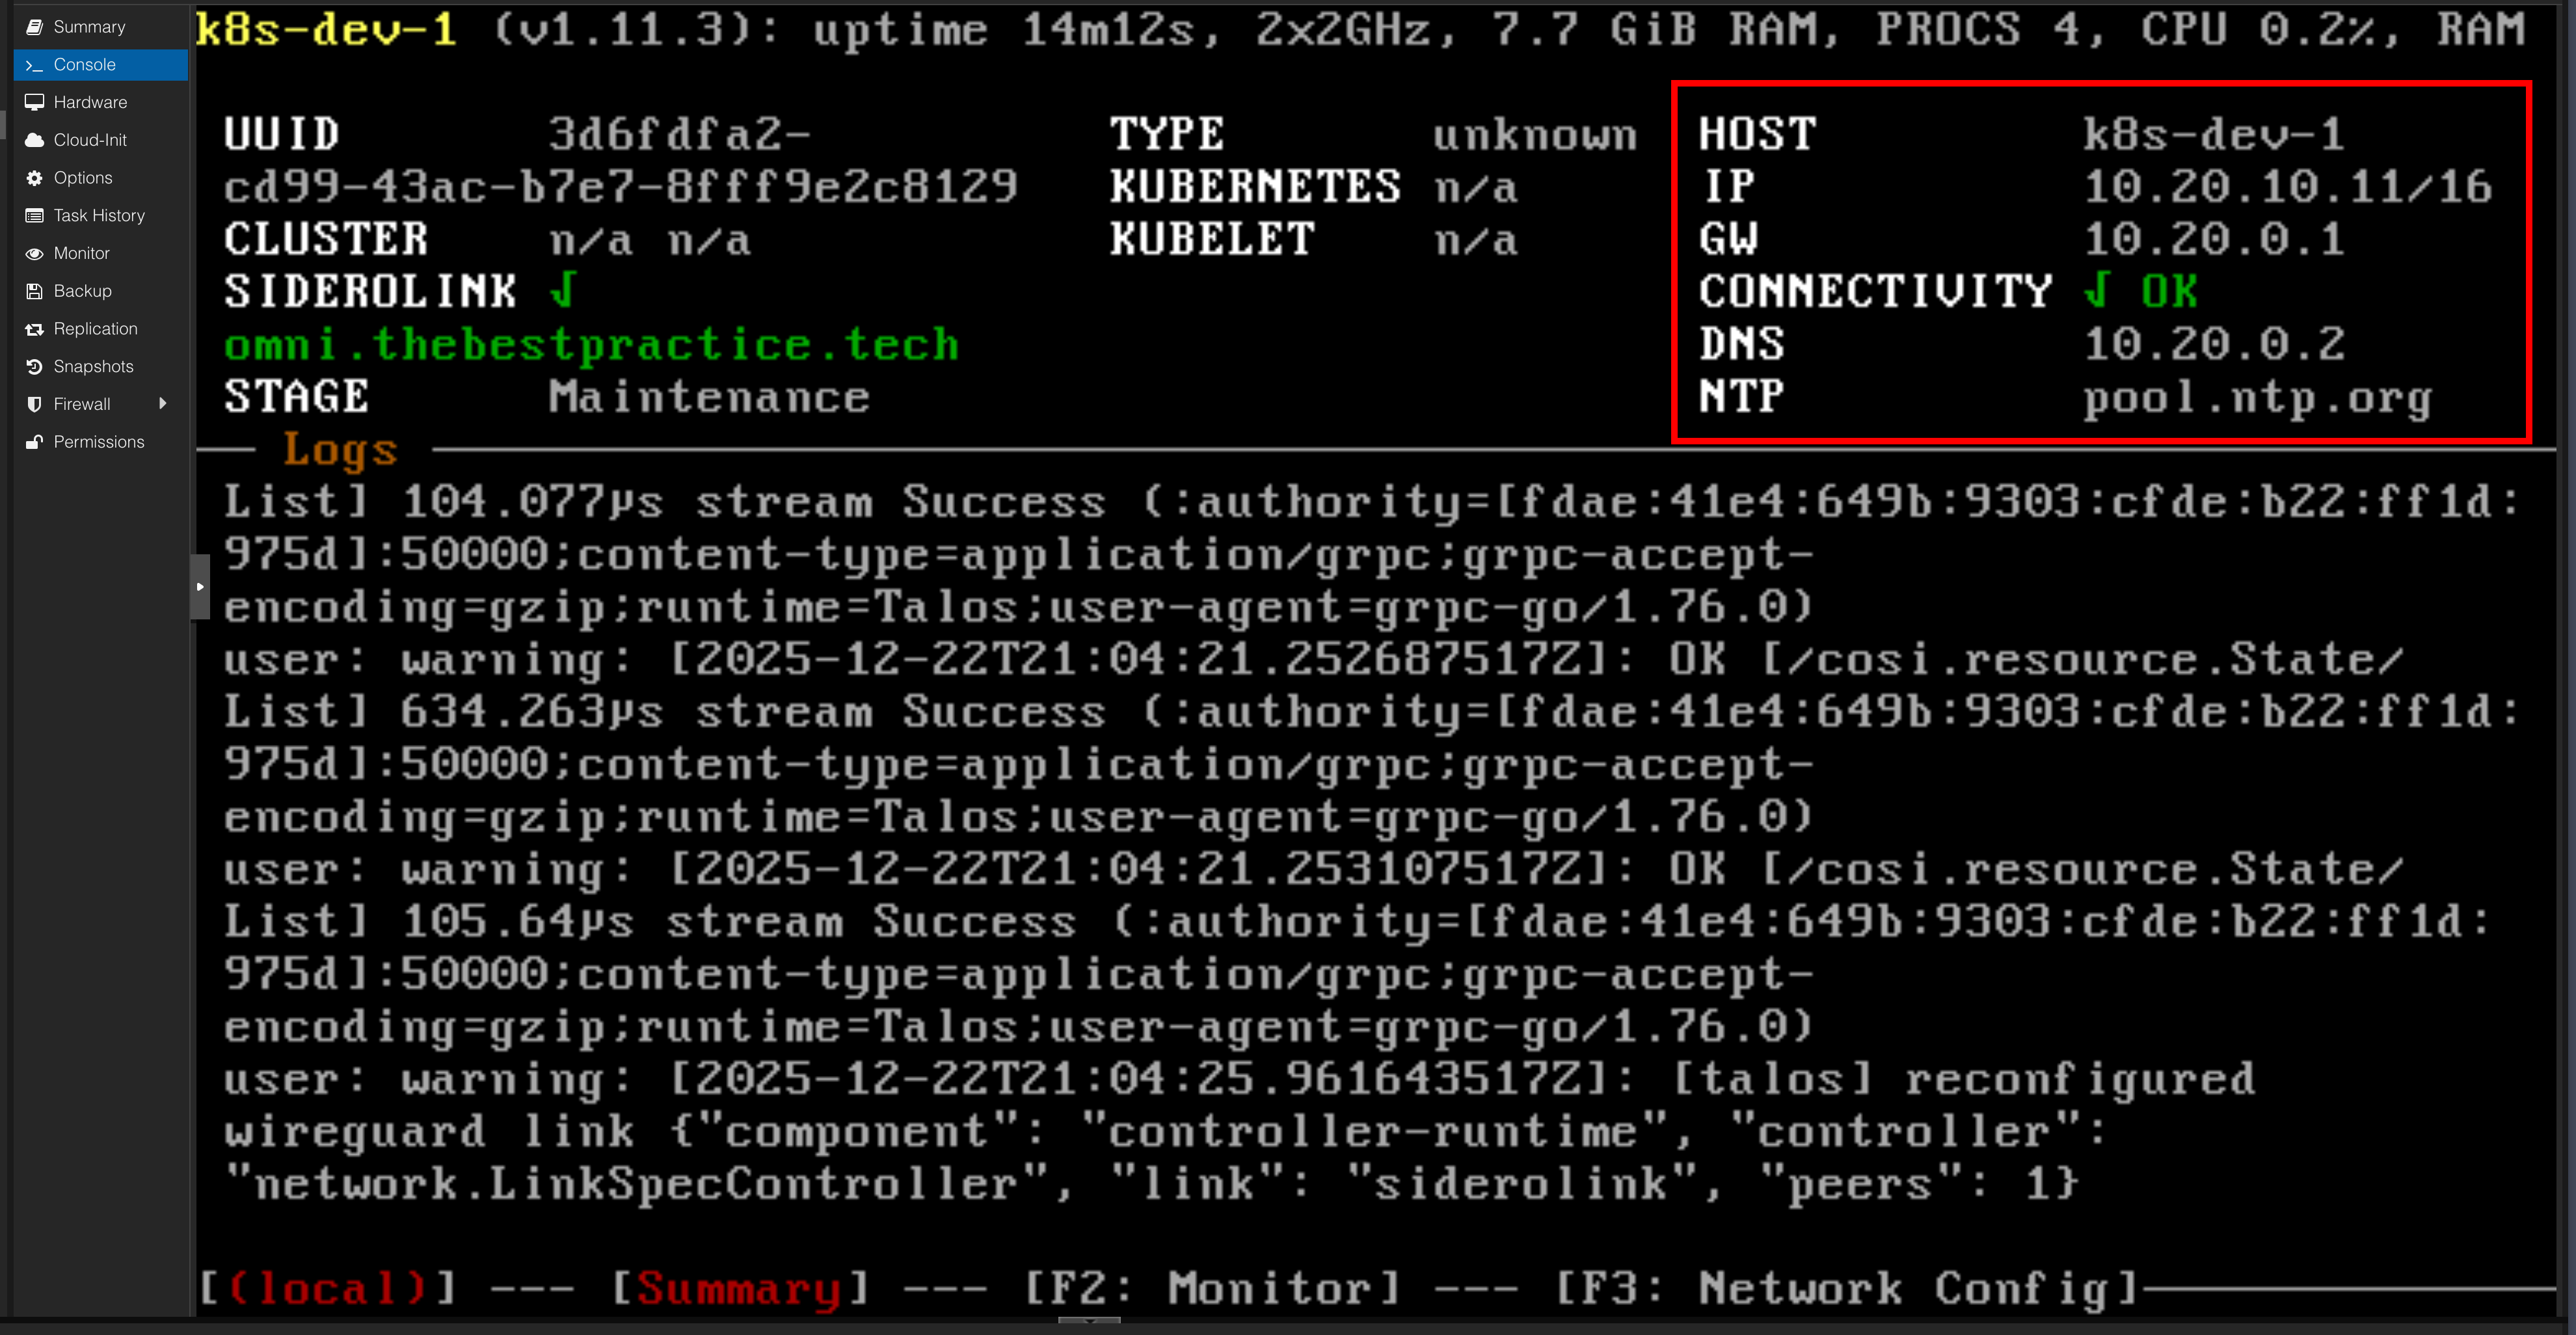
When the VMs boot for the first time, they will get an IP address from your DHCP server. For a stable cluster, we need static IPs.
Open the console for each VM in Proxmox. You’ll be greeted by the Talos configuration screen. Press F3 to edit the network settings.
Configure each node as follows, using a unique IP address for each:
VM 1 (k8s-dev-1)
- Hostname:
k8s-dev-1 - DNS Server:
10.20.0.2(My local Pi-hole) - Timeserver:
pool.ntp.org - Interface:
ens18(or your VM’s network interface) - Mode:
Static- Addresses:
10.20.10.11/16 - Gateway:
10.20.0.1
- Addresses:
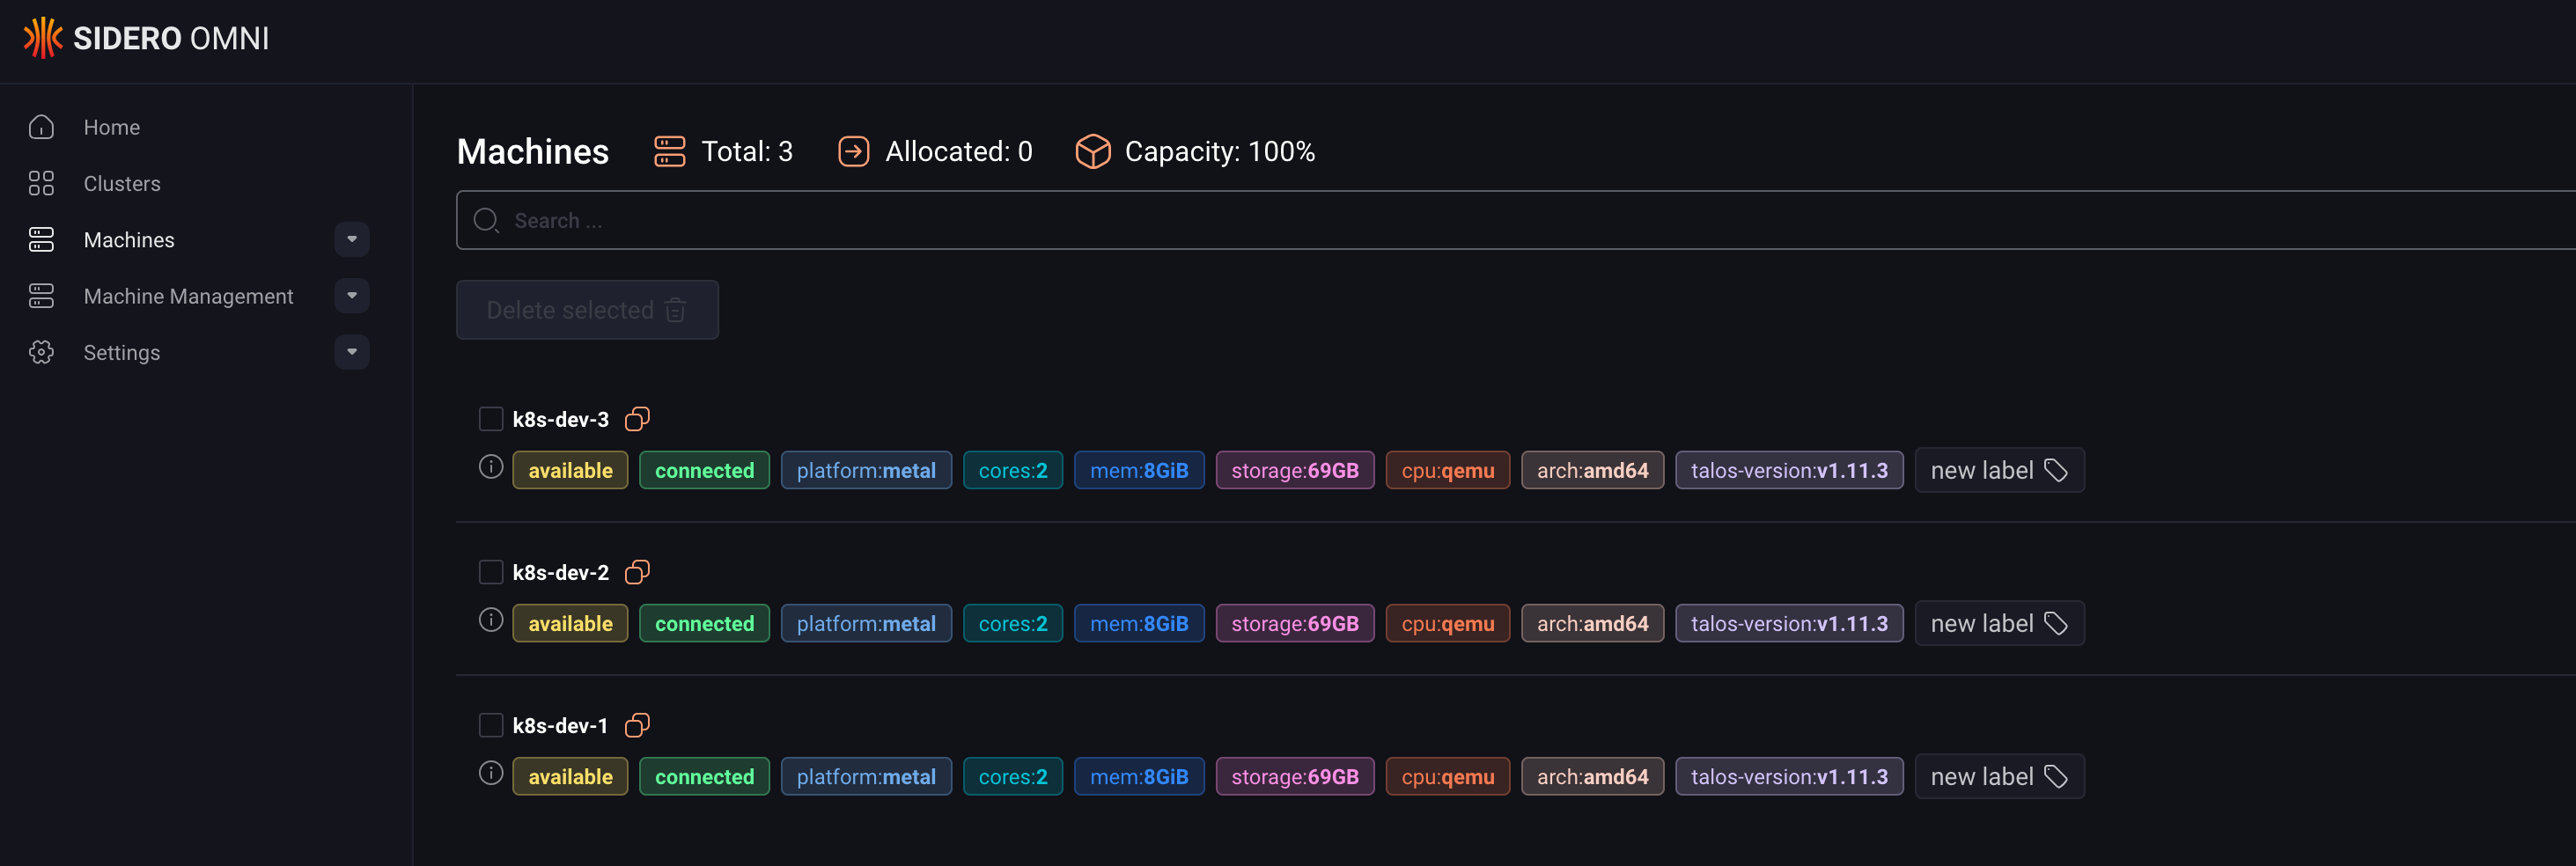
Repeat this process for k8s-dev-2 (using 10.20.10.12/16) and k8s-dev-3 (using 10.20.10.13/16).
Once you save the configuration on each node, they will reboot. Back in the Omni UI, you’ll see the machines appear in the Machines tab with their new hostnames.
Step 4: Create the Cluster and Apply Patches#
With our machines registered in Omni, we can now create the cluster.
- In Omni, go to the Clusters tab and click Create Cluster.
- Give it a name (e.g.,
k8s-dev). - Select the three machines we just configured and add them to the cluster.
- Crucially, before finalizing, we need to apply a patch to allow workloads to run on our control plane nodes. This is perfect for a small dev cluster.
For each machine in the cluster configuration, add the following patch:
cluster:
  allowSchedulingOnControlPlanes: true
This tells Talos that the Kubernetes scheduler is allowed to place pods on the nodes that are also running the control plane components (like etcd and the API server).
Once patched, create the cluster. Omni will now orchestrate the bootstrapping process across the three nodes.
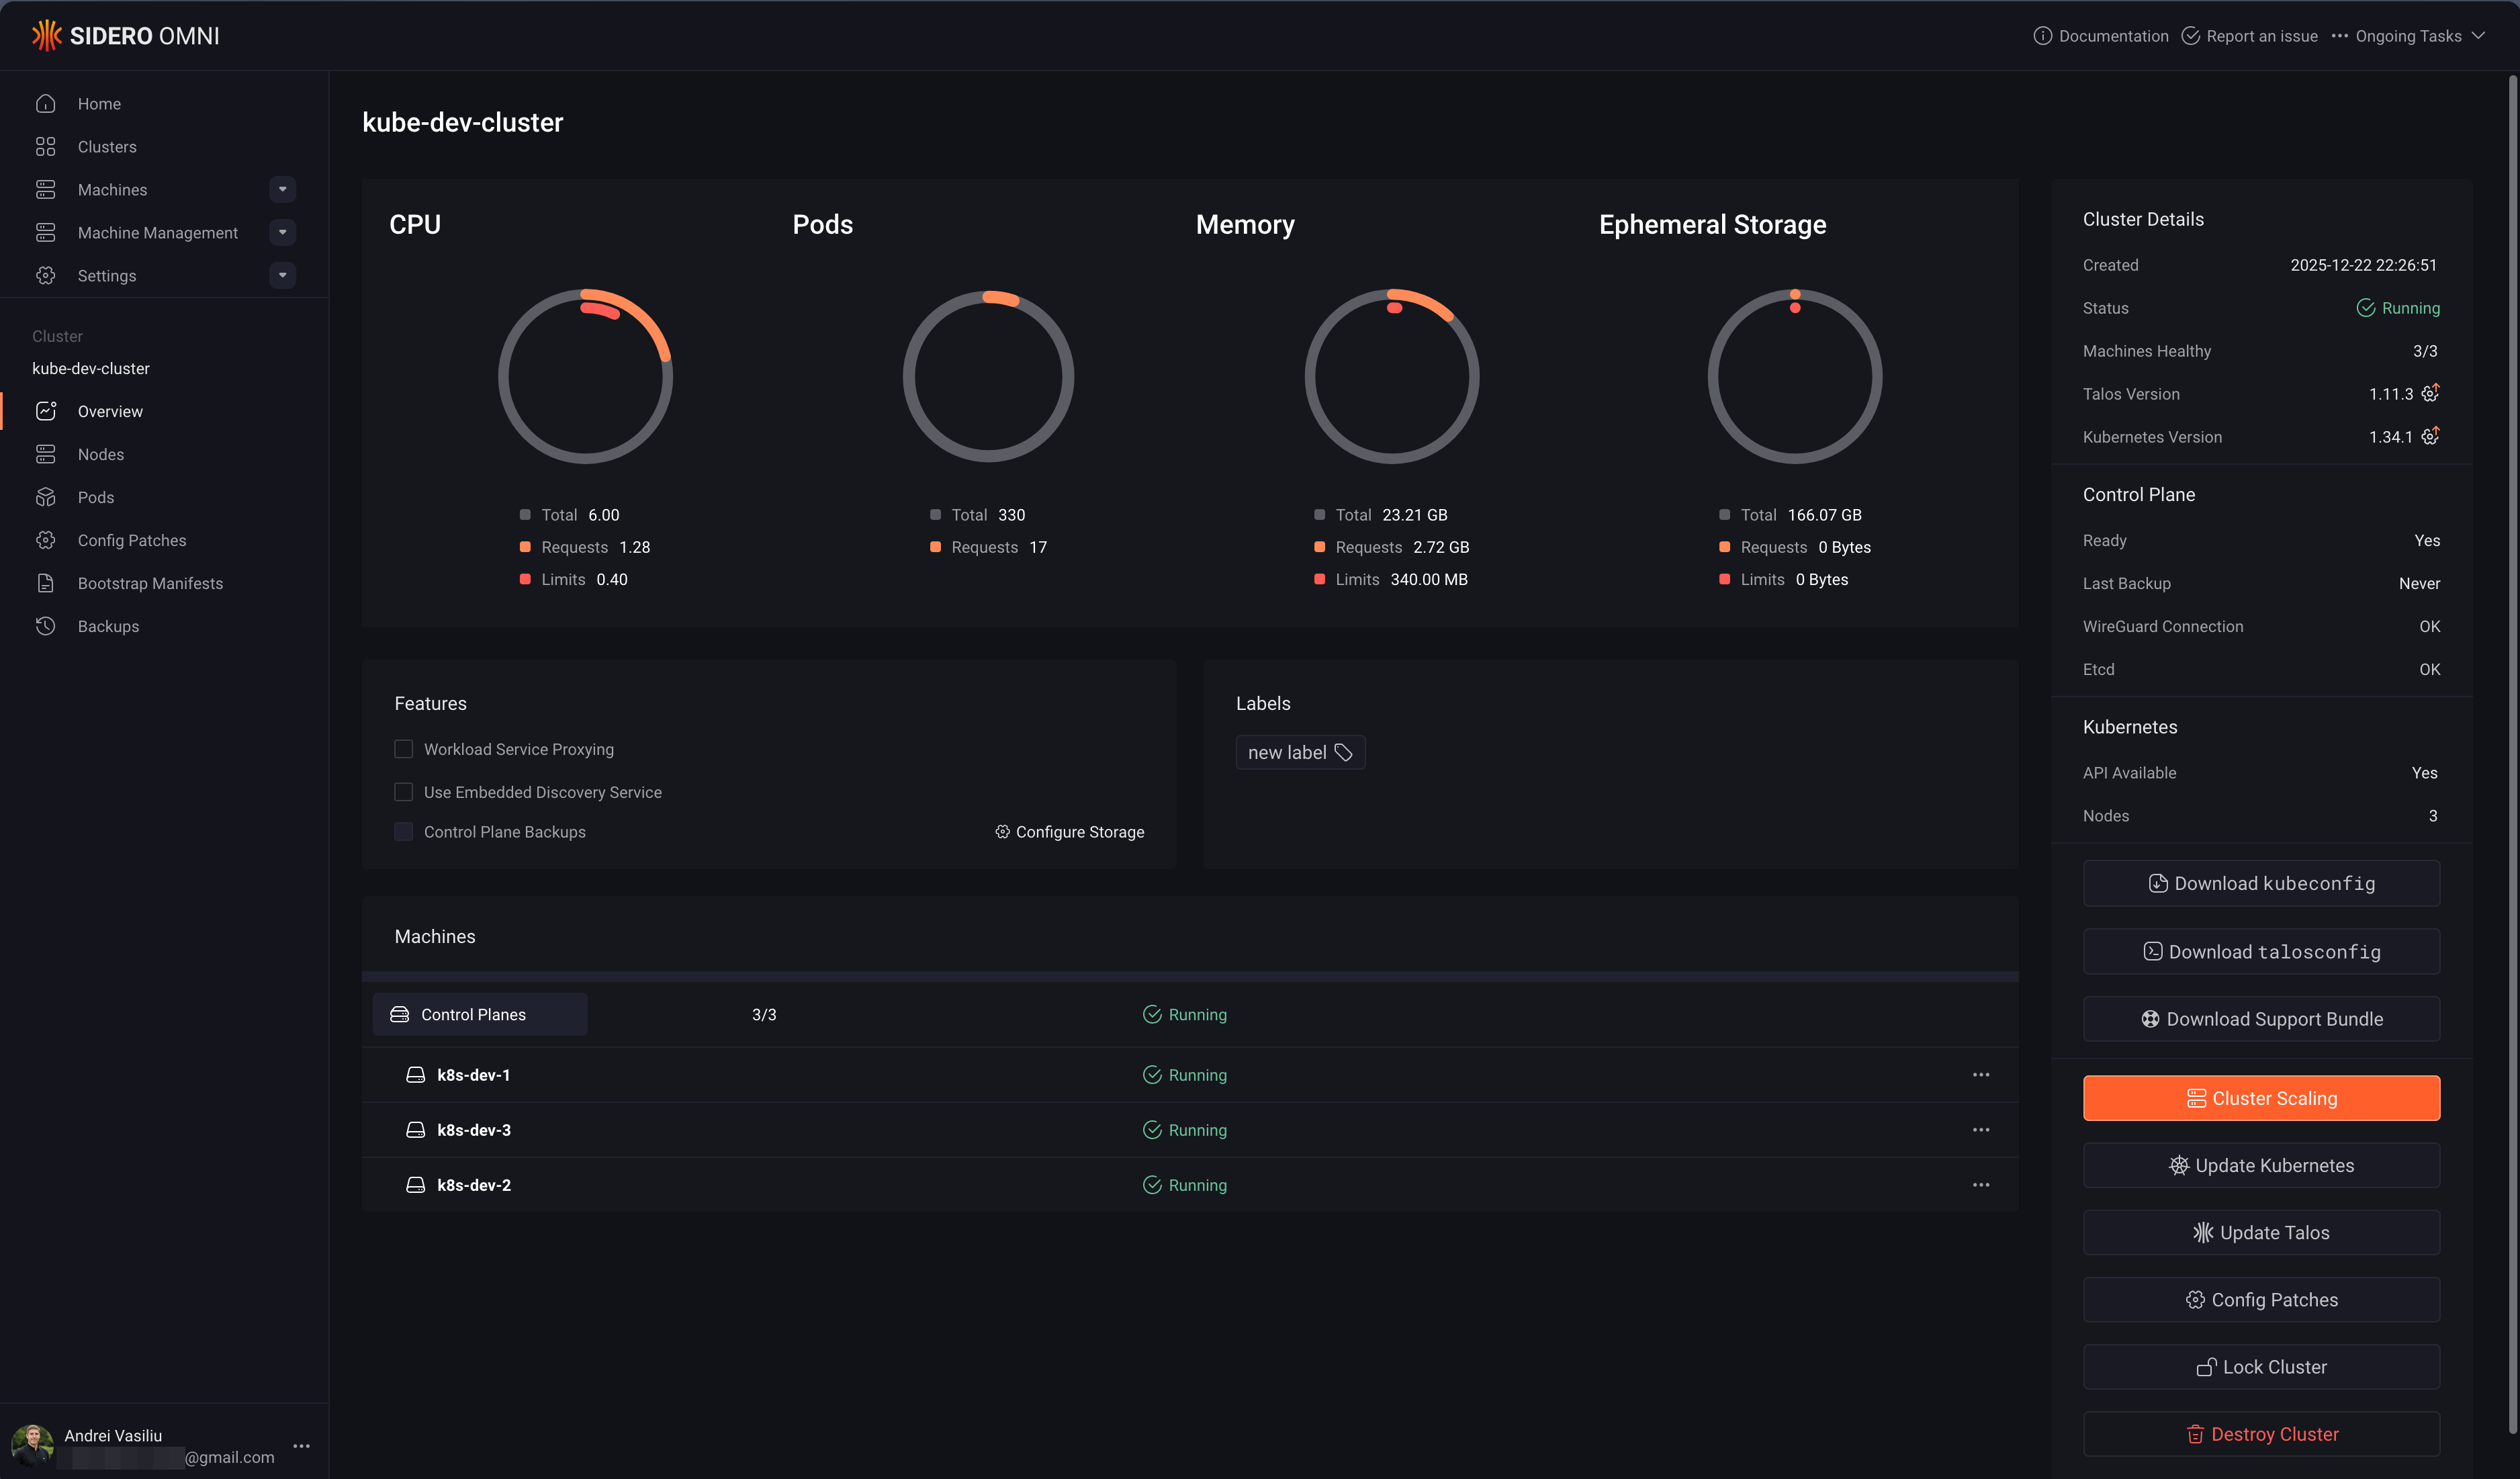
Step 5: Access Your New Cluster with kubectl#
After a few minutes, the cluster will be up and running. The final step is to connect to it.
- Download Kubeconfig: In the Omni UI, navigate to your
k8s-devcluster’s page and click Download Kubeconfig. - Merge Kubeconfig: Add the contents of the downloaded file to your local
~/.kube/configfile. - Install
kubelogin: Omni uses OIDC for authentication, so you need akubectlhelper. Install it with Homebrew:This plugin handles the OIDC login flow automatically when you usebrew install kubeloginkubectl. - Verify Access: Run a
kubectlcommand. The first time,kubeloginwill open a browser window for you to authenticate via Auth0 (or whichever SSO provider you configured).You should see your three nodes reported askubectl get nodesReady!
NAME        STATUS   ROLES           AGE   VERSION
k8s-dev-1   Ready    control-plane   10m   v1.34.1
k8s-dev-2   Ready    control-plane   10m   v1.34.1
k8s-dev-3   Ready    control-plane   10m   v1.34.1
Conclusion: The Power of the “Scenic Route”#
And there you have it… a fully functional Talos Kubernetes cluster, built from scratch. While this manual process is slower than an automated one, it provides an invaluable look into the moving parts of a Kubernetes deployment. You’ve touched the networking, storage, and OS layers directly, which builds a strong mental model for troubleshooting later.
Now that we’ve mastered the manual way, stay tuned for my next post, where we’ll make this entire process disappear with the magic of the Omni Proxmox Provider.
Stay tuned. Andrei